
A Natural Easter Craft for the Whole Family | Coloring Easter Eggs with Whipped Cream

Holidays are such a fun time to make keepsake crafts with your kiddos. This is only Blake's second Easter and she already has a handful of Easter crafts that we have saved in her keepsake box. From the Easter egg painting from the library, to the wooden Easter egg magnets, there is so much we want to save for Blake to look back on later!
This year, I was wanting to do a fun Easter craft with Blake that would leave us with a great memory to have forever. When I saw the video on Facebook using shaving cream to color Easter eggs, I knew that I wanted to try a version of that. I wasn't crazy about the idea of eating eggs soaked in shaving cream chemicals and I am not one to waste good food, so I thought we could use whipped cream instead!
Needed Items For Whipped Cream Egg Coloring:
- Tub of whipped cream
- Food coloring
- Vinegar
- Hard boiled eggs
- A few large containers


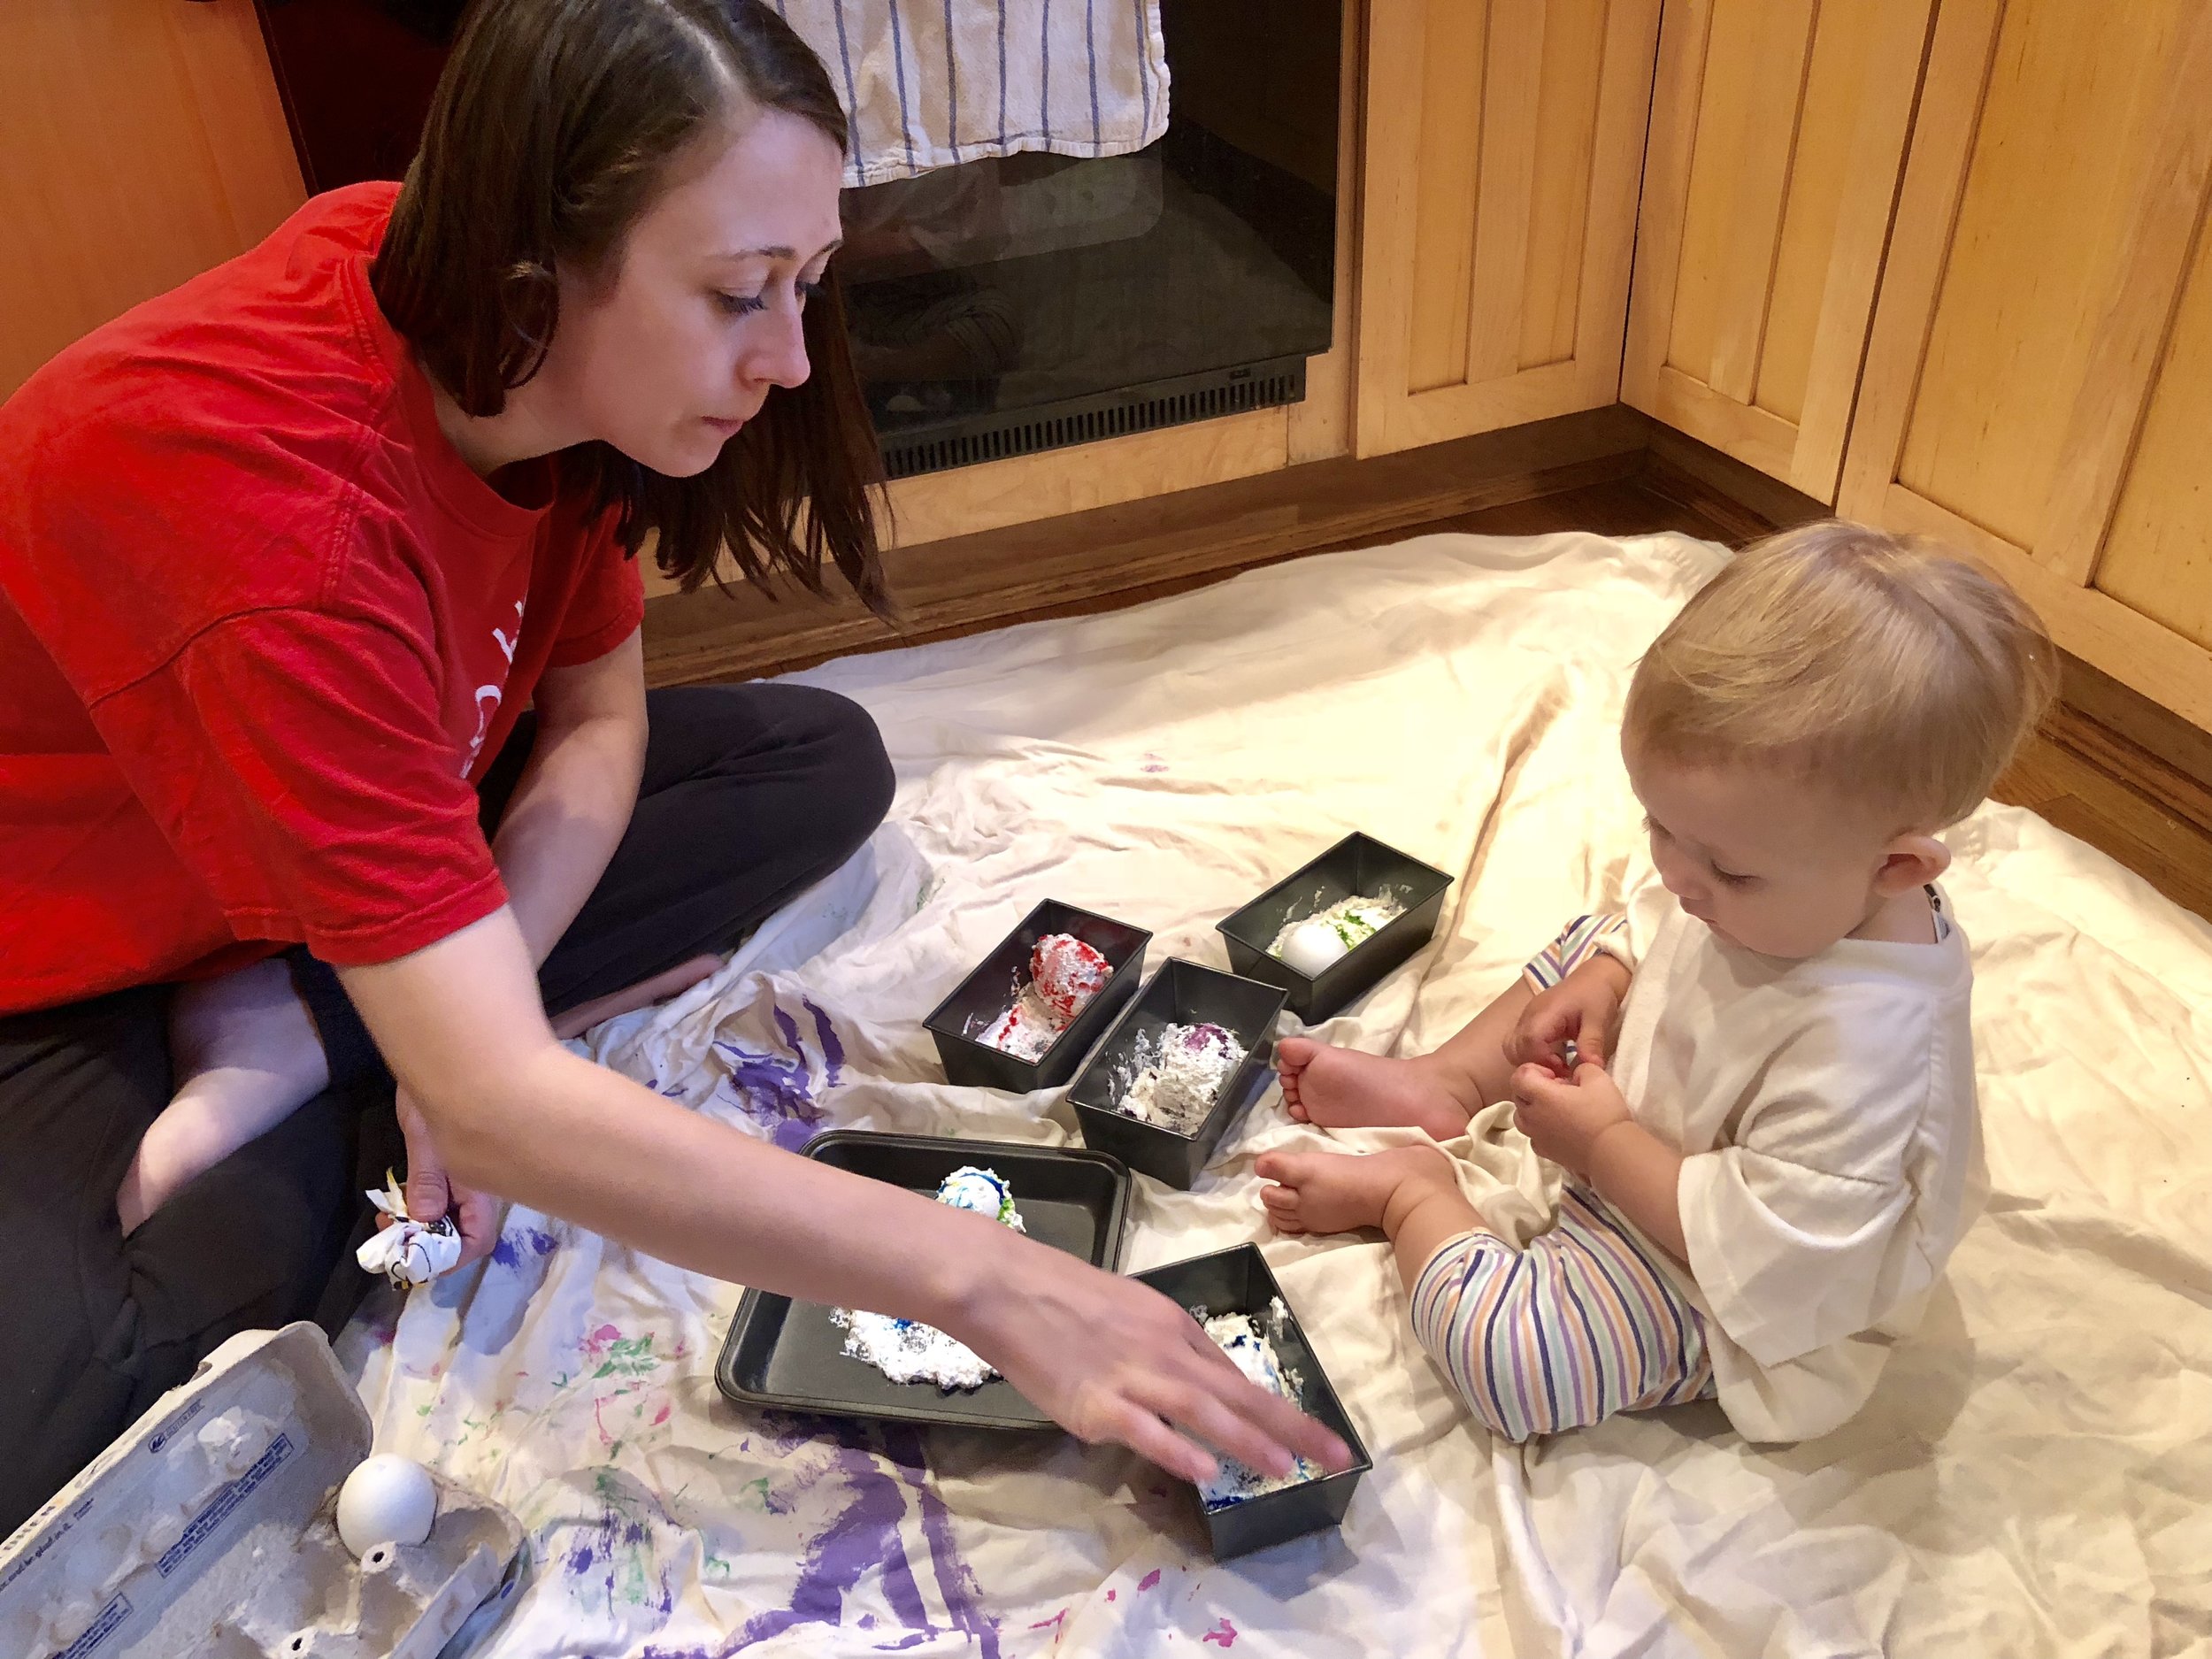
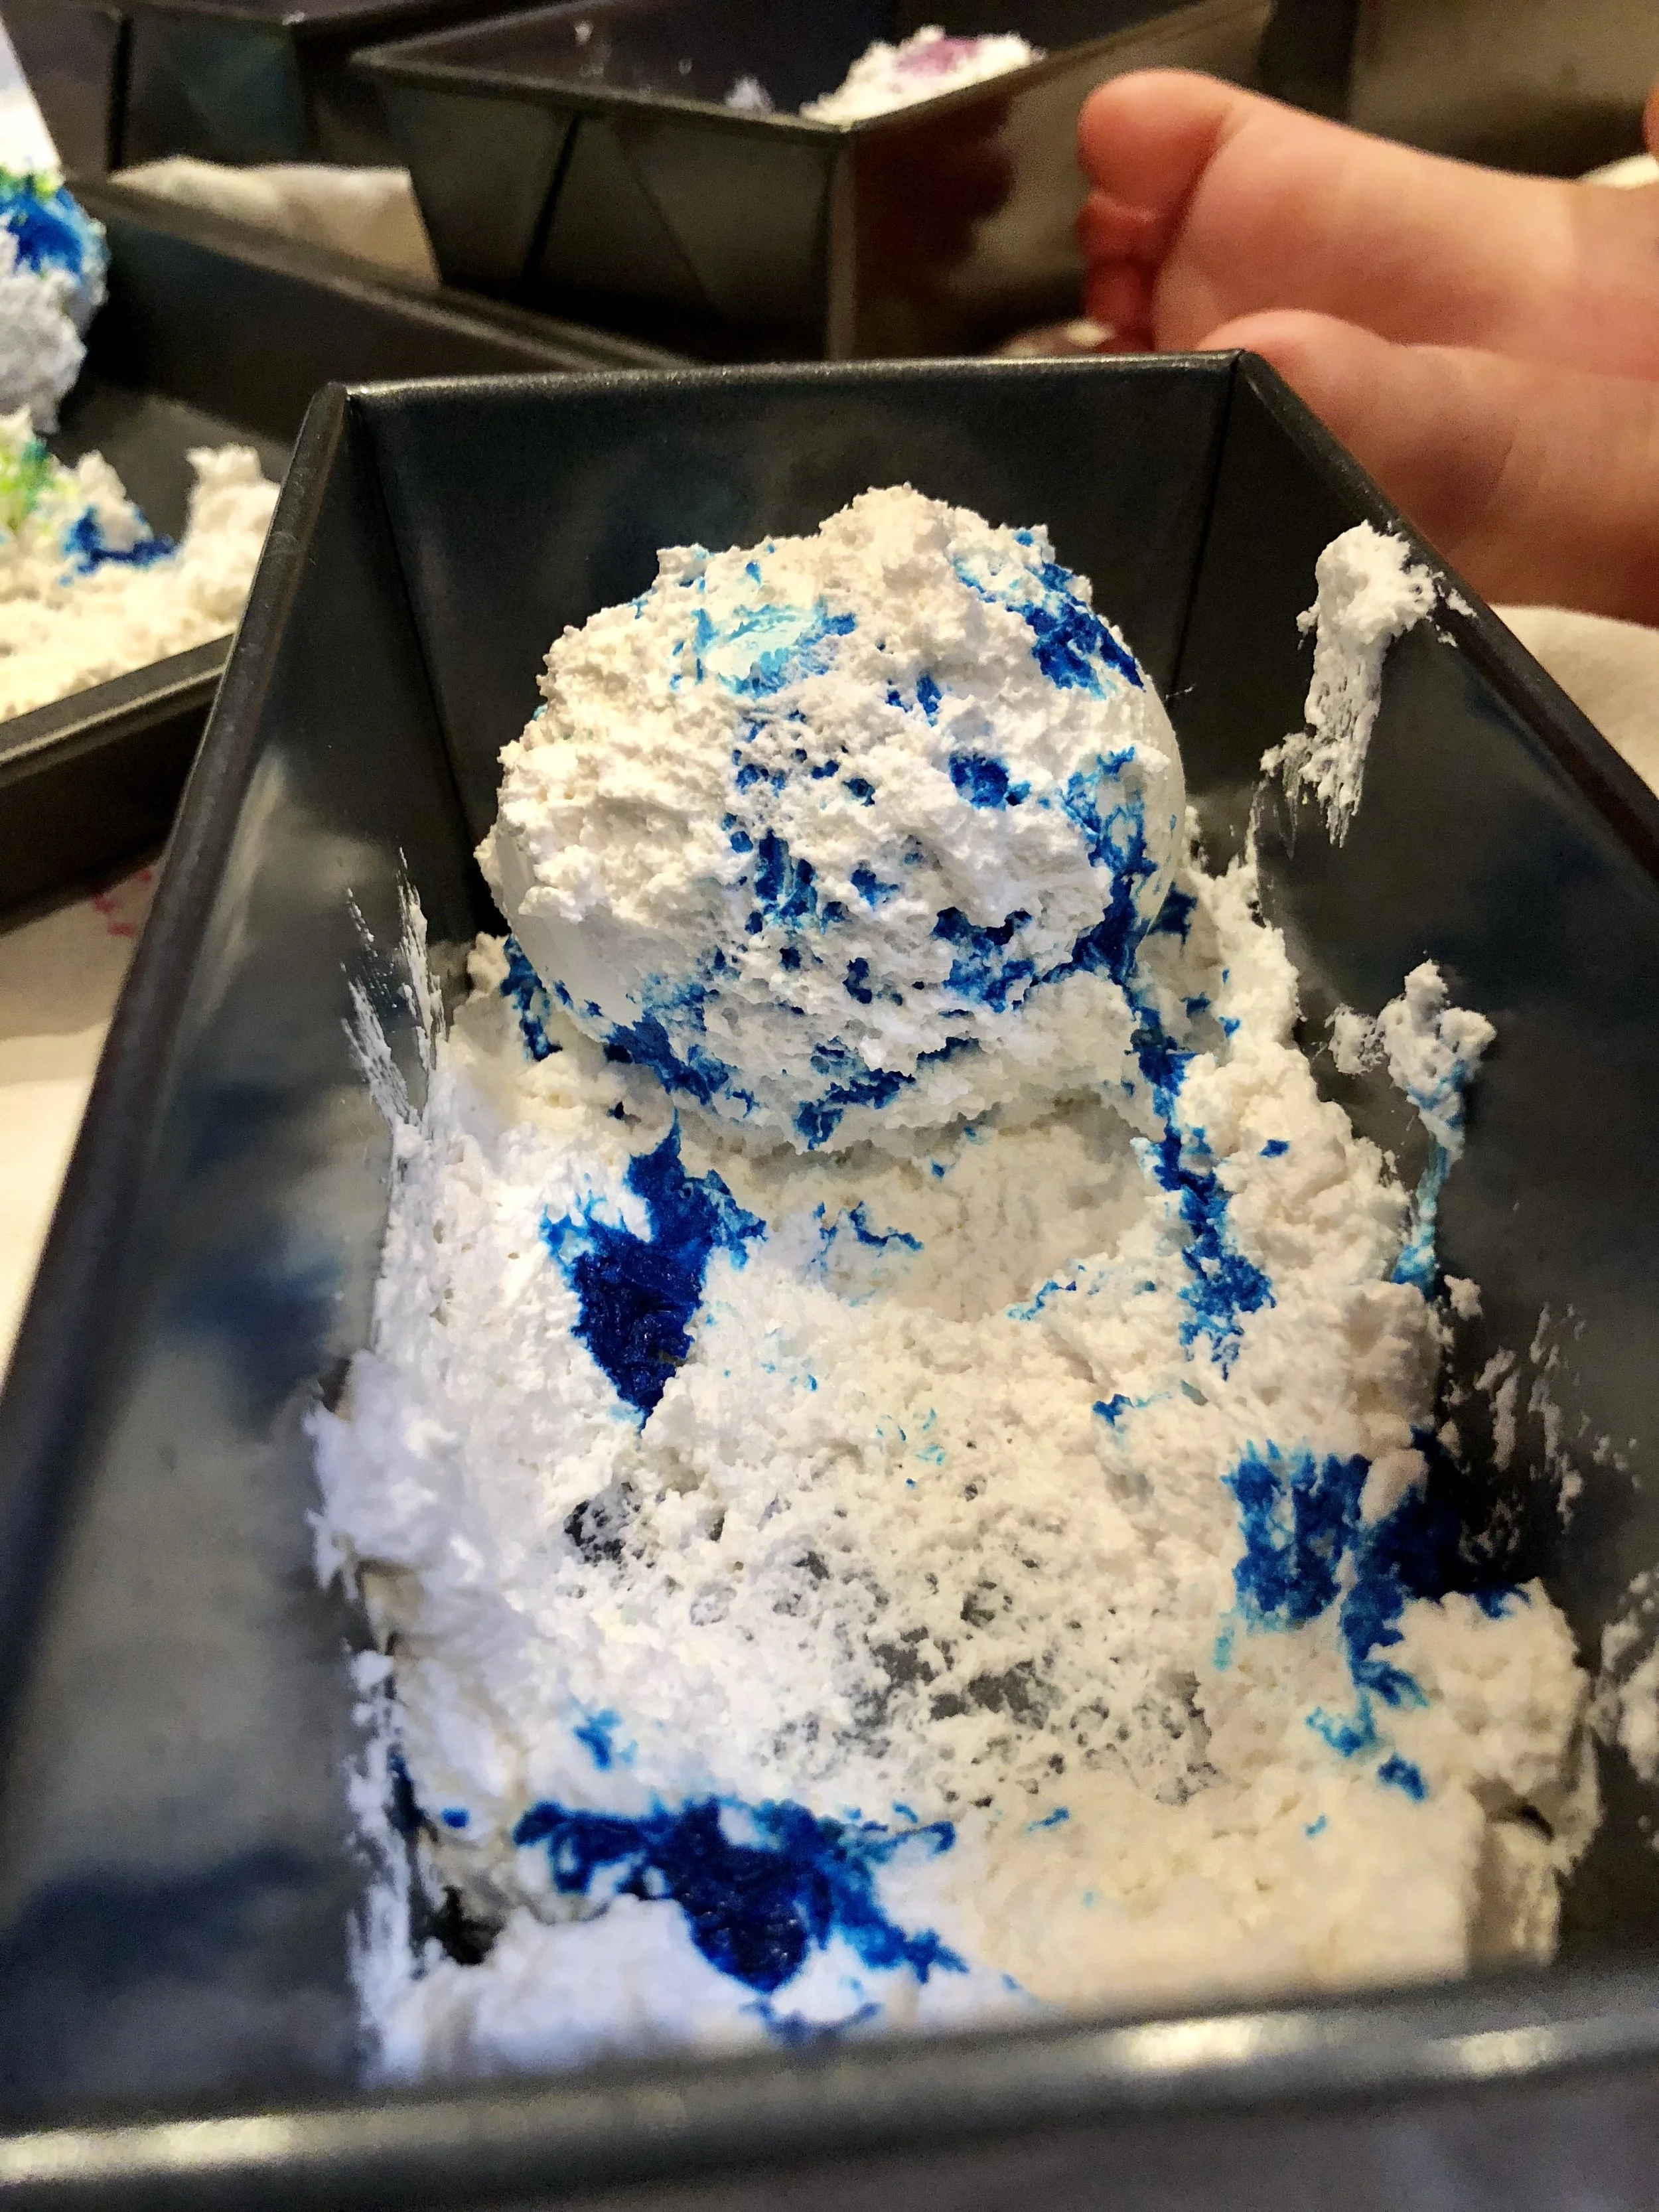


This craft was super easy to set up! First, hardboil the eggs and let them cool. Then, soak the eggs in vinegar for about 20 minutes. This is important because the vinegar helps the dye to stick to the egg shells. While the eggs were soaking in vinegar, I set out 5 containers and filled them each with a layer of whipped cream.
Pro tip: We used TruWhip, a natural whipped cream, but the consistency was a bit different than what we needed. Next year, we will use regular CoolWhip for the right consistency to be able to roll the eggs better
Next, put a few drops of food coloring in each container. Be sure not to mix all the colors together or else you might end up with an ugly brown egg! You can mix two or three colors in the same container to get a cool tie-dye effect! Take a toothpick and swirl the colors around throughout the whipped cream.
Pro tip: Use natural food coloring to avoid ingesting the artificial dyes.
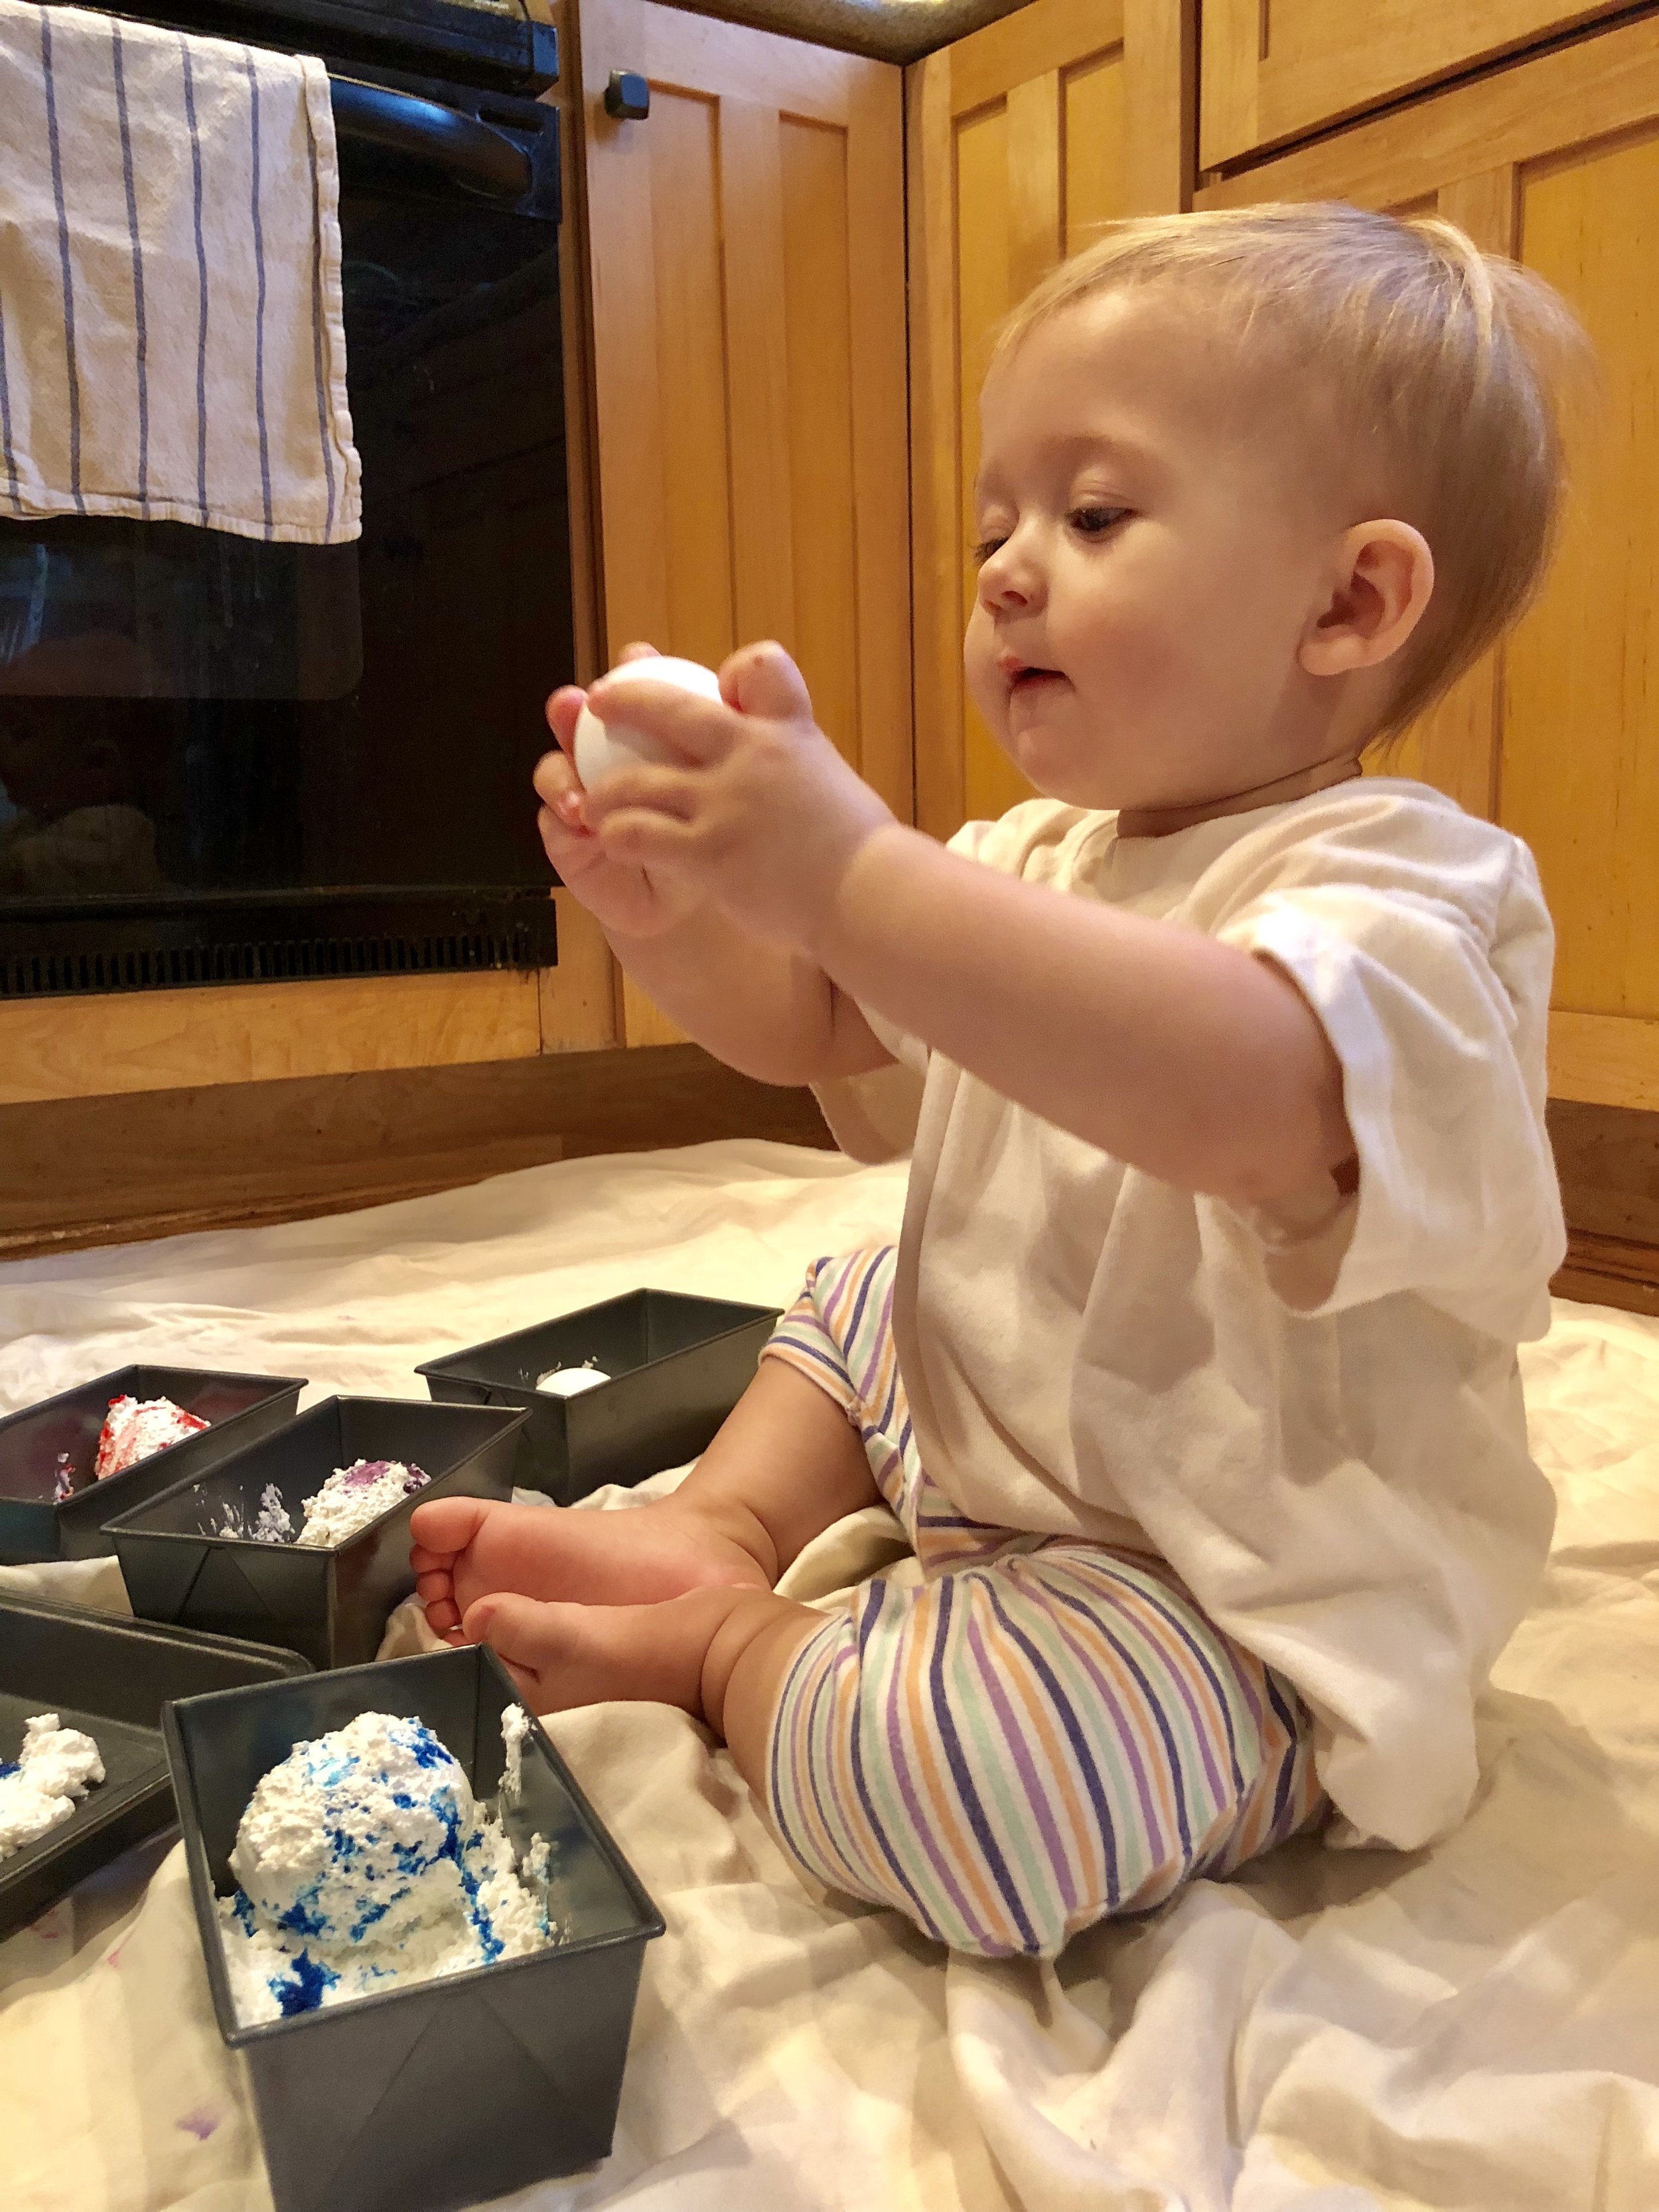
Finally, it's time for you to color some eggs! Place your eggs in the whipped cream and roll them around until they are fully coated in whipped cream and food coloring! Blake had so much fun with this part! However, she doesn't like to be messy, so she asked for a spoon to roll the eggs with. That was fine by me as it made clean up so much easier!
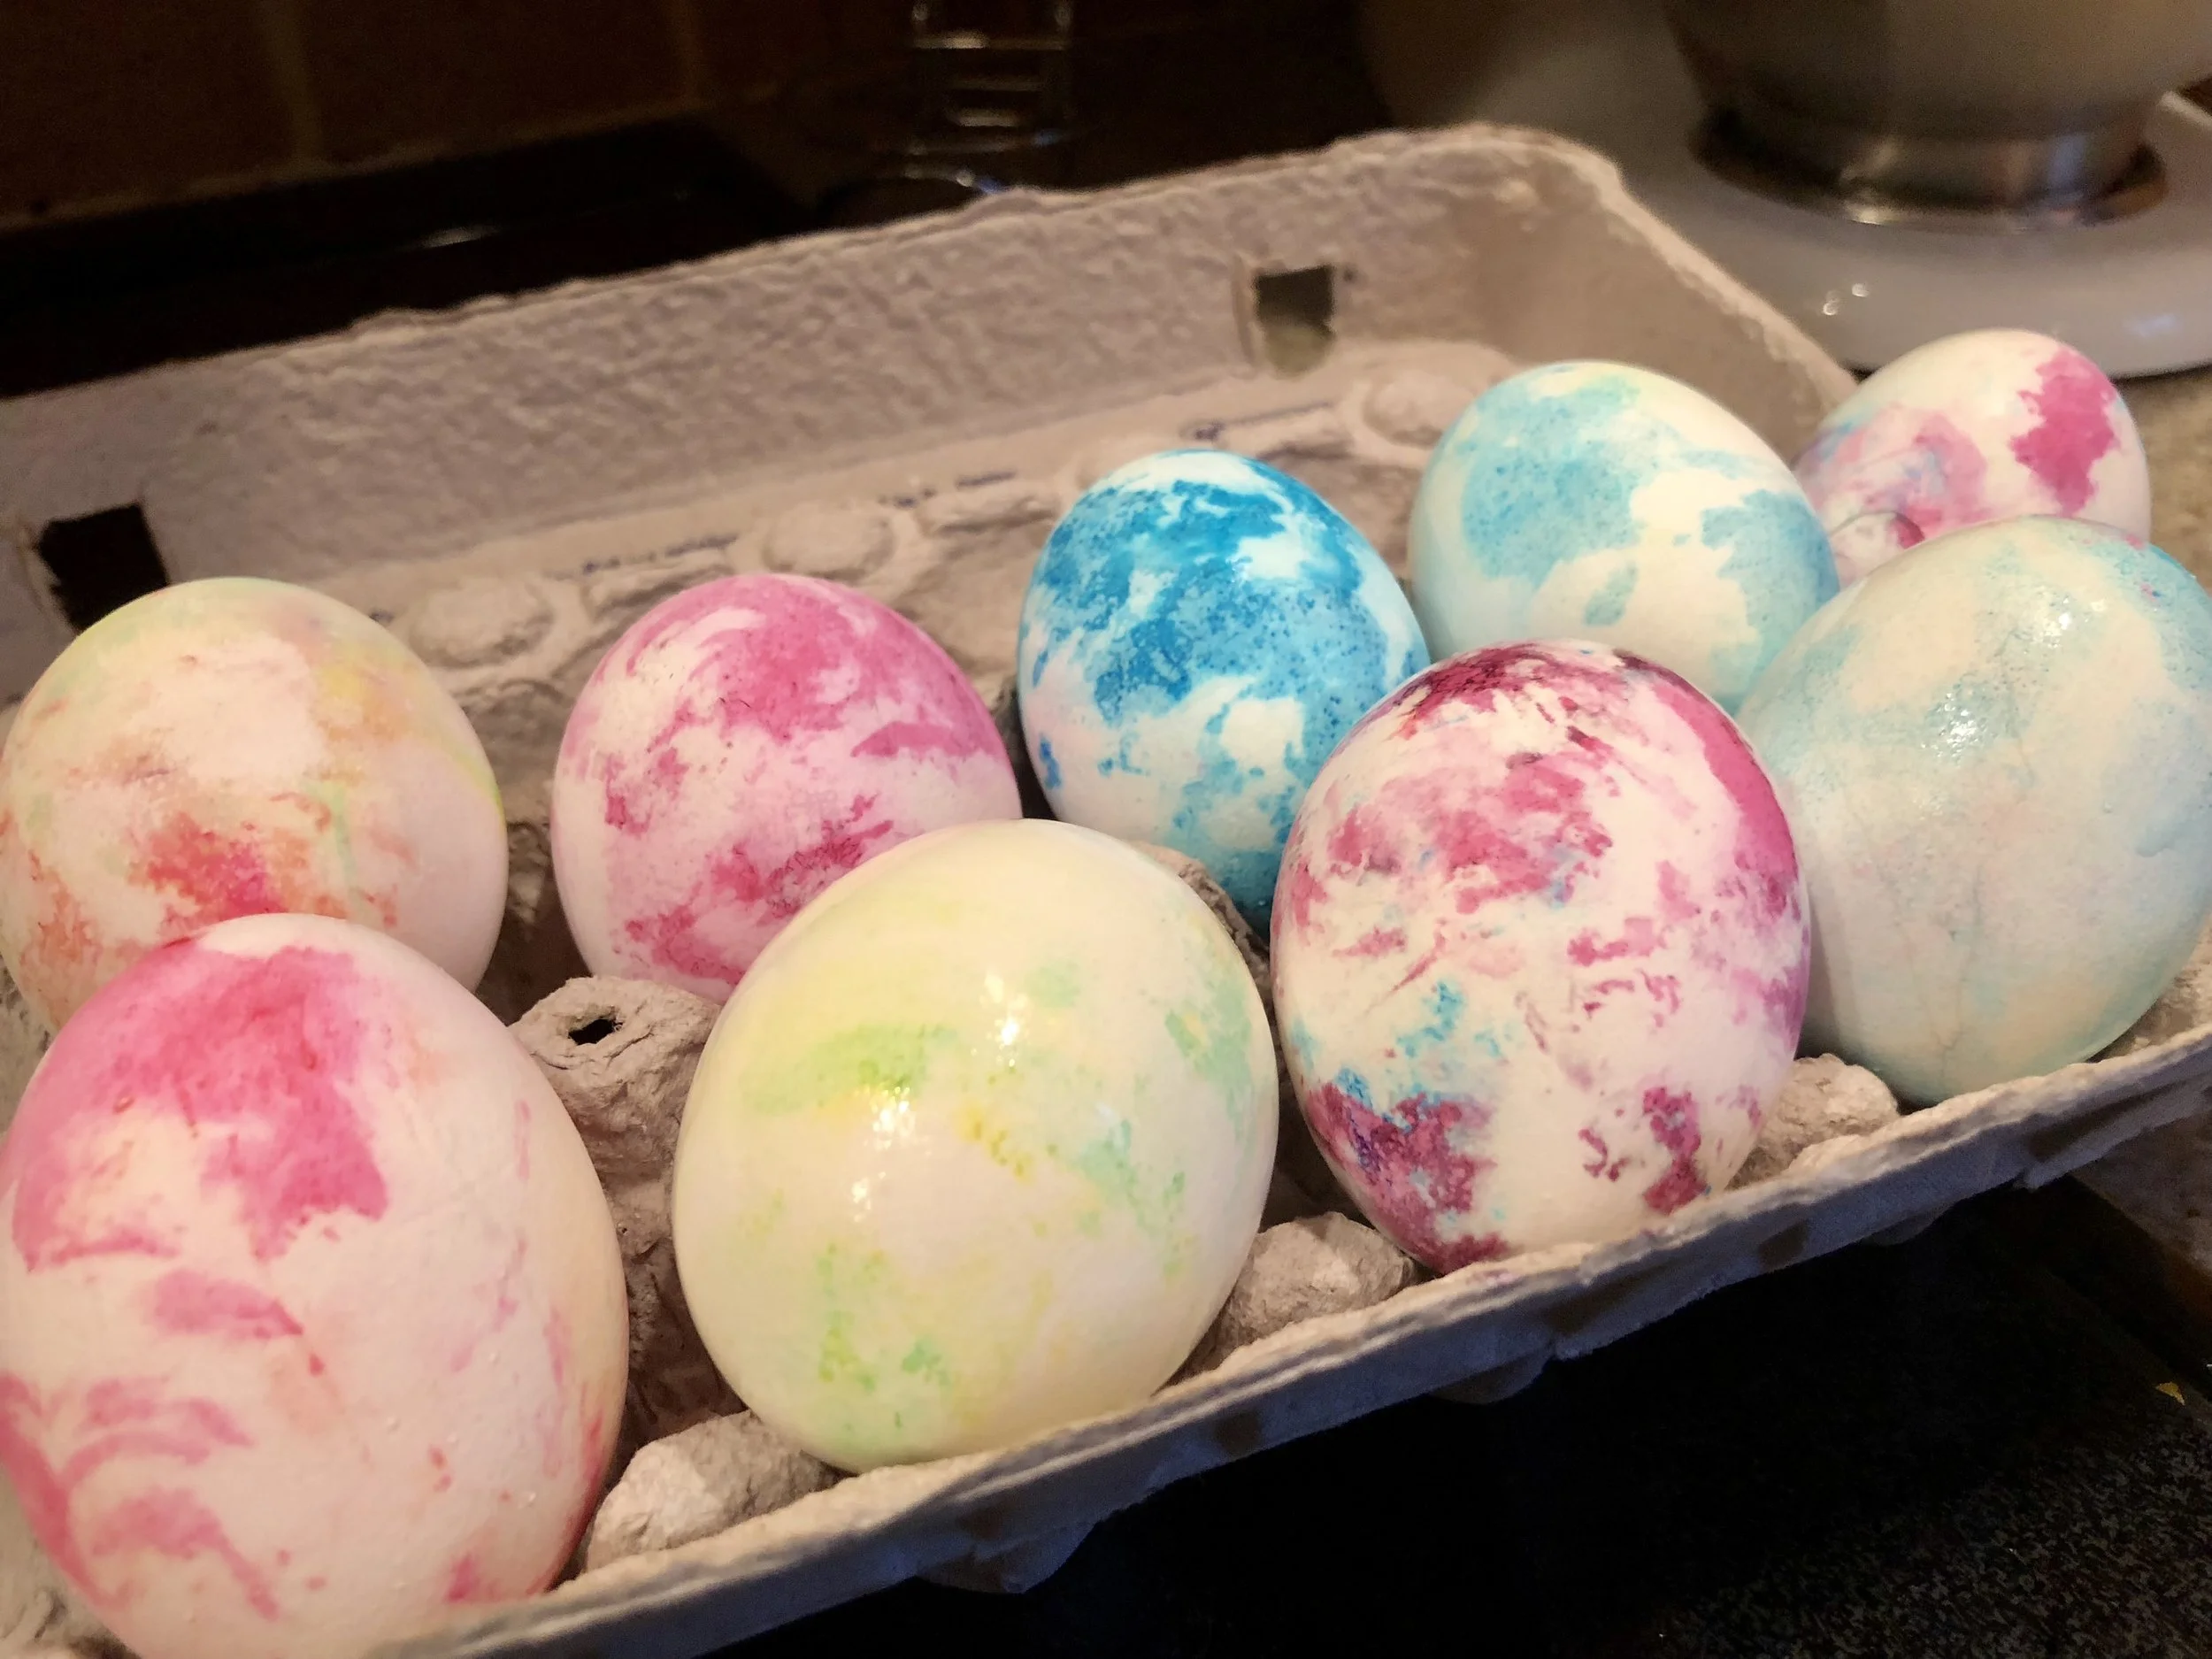
After all the eggs are coated in dye, let them sit for about 20 minutes before wiping them off with a paper towel. We made the mistake of rinsing the first few with water, and it took off some of the color. We love how well our eggs turned out and I am excited to turn them into deviled eggs to eat this weekend!
If you use this method of coloring eggs, we would love to see some pictures of your finished Easter eggs!
*This post does include some affiliate links. However, we do not suggest products that we don't believe in or haven't used.*